Article
March 2, 2024
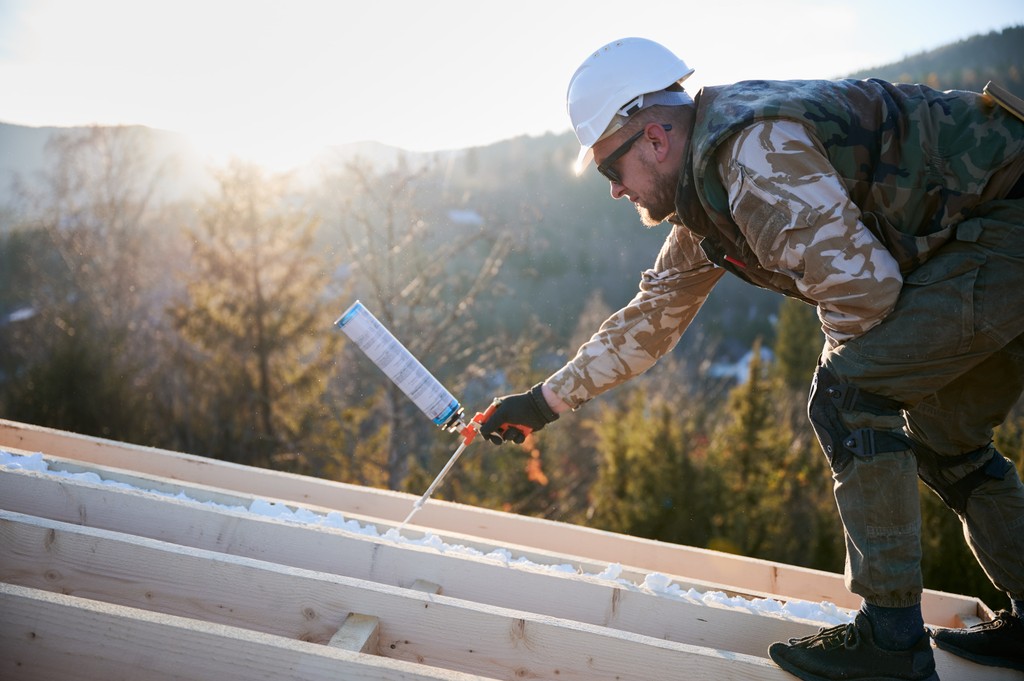
Building the Frame and Structure of a Roof
Article
March 2, 2024
Building the Frame and Structure of a Roof
Article
March 2, 2024
Building the Frame and Structure of a Roof
The roof is one of the most critical elements in any home’s construction, providing protection and structural integrity. Building the frame and structure of a roof requires careful planning, the right materials, and precise techniques. Whether you're a professional builder or a DIY enthusiast, this guide will walk you through the fundamental steps of constructing a strong, durable roof frame and structure. We’ll also cover essential terms, materials, and safety tips to help ensure a successful roofing project.
The roof is one of the most critical elements in any home’s construction, providing protection and structural integrity. Building the frame and structure of a roof requires careful planning, the right materials, and precise techniques. Whether you're a professional builder or a DIY enthusiast, this guide will walk you through the fundamental steps of constructing a strong, durable roof frame and structure. We’ll also cover essential terms, materials, and safety tips to help ensure a successful roofing project.
1. Understanding Roof Structure Components
Before starting, it’s crucial to familiarize yourself with the key components that make up a roof’s structure:
Rafters: The sloped beams that form the roof’s main structure.
Trusses: Pre-fabricated wooden frameworks that provide support and shape for the roof.
Ridge Board: The horizontal beam at the peak of the roof where rafters meet.
Collar Ties: Horizontal beams that connect rafters near the ridge to prevent sagging.
Joists: Horizontal beams that run between walls and support the ceiling and roof.
Each part works together to create a stable, weatherproof structure that supports the roof covering and ensures safety.
2. Roof Design and Planning
Planning your roof’s design is essential before you begin any construction. Some of the most common roof styles include:
Gable Roof: A triangular-shaped roof that is simple to build and offers great ventilation.
Hip Roof: A roof where all sides slope downward, providing extra stability in windy areas.
Shed Roof: A single-sloping roof often used for home extensions or modern architecture.
Once you’ve chosen your design, use a blueprint to map out dimensions and angles. Make sure to account for local building codes, snow loads, and wind resistance in your area to ensure compliance with regulations.
3. Gathering the Right Materials and Tools
To build a roof frame and structure, you'll need a variety of materials and tools. Some of the key materials include:
Lumber: Choose high-quality lumber like treated pine or fir for rafters, joists, and trusses.
Fasteners: Nails, screws, and brackets are essential for securing beams.
Roof Sheathing: Typically plywood or oriented strand board (OSB), provides a surface for roofing material.
Roof Underlayment: A protective layer, such as roofing felt, is placed between the roof sheathing and outer roofing materials.
For tools, ensure you have the following:
Measuring tape, framing square, and level.
Circular saw or hand saw.
Hammer or nail gun.
4. Constructing the Roof Frame
Step 1: Installing the Ridge Board
Start by securing the ridge board at the top of the roof. The ridge board is the central beam where the tops of the rafters will meet. It needs to be level and well-supported at both ends by the walls of the house or structure.
Step 2: Attaching Rafters
Next, attach the rafters to the ridge board and walls. The rafters create the sloped sides of the roof and must be cut at precise angles to fit securely. Start at one end and work your way down, spacing the rafters evenly (typically 16 to 24 inches apart).
Step 3: Adding Collar Ties
Once the rafters are in place, you’ll need to add collar ties for additional strength. These horizontal beams connect rafters near the roof peak to help resist the outward force of wind or snow.
Step 4: Installing Roof Trusses (Optional)
For larger roofs or prefabricated designs, roof trusses may be used instead of individual rafters. Trusses are triangular-shaped frameworks that offer added strength and stability. Place trusses every 2 feet and secure them to the top plate of the walls.
5. Laying the Roof Sheathing
Once the roof frame is complete, it's time to install the roof sheathing. This layer forms the foundation for your roofing material, providing structural support and a barrier against the elements. Follow these steps:
Start from the bottom and work your way up, ensuring the panels are staggered for extra strength.
Nail the plywood or OSB sheathing to the rafters or trusses, making sure it’s flush and secure.
Leave small gaps between the sheathing panels to allow for expansion.
6. Applying the Underlayment
With the sheathing in place, the next step is to install a roof underlayment. This protective barrier, usually made of felt or synthetic materials, goes between the sheathing and the final roofing material (like shingles or tiles) to provide water resistance.
Roll out the underlayment from the bottom edge of the roof upward, overlapping each layer as you go.
Secure the underlayment with roofing nails or staples.
7. Adding Roof Flashing
Roof flashing is critical to prevent leaks, particularly around vulnerable areas such as chimneys, vents, and skylights. Install metal flashing where the roof meets these structures to channel water away and protect against leaks.
8. Safety Tips for Roof Construction
Building a roof can be dangerous due to the heights involved and the use of heavy materials. Always follow these safety tips:
Use fall protection: Wear a safety harness and use roof anchors to prevent falls.
Secure the ladder: Ensure your ladder is stable and extends 3 feet beyond the edge of the roof.
Work in pairs: Always have someone nearby in case of emergencies.
Wear protective gear: Helmets, gloves, and non-slip shoes are essential for safety on the job site.
Conclusion
Building the frame and structure of a roof is a complex but rewarding task that requires precision and attention to detail. By understanding the components of a roof structure, planning your design carefully, and using high-quality materials, you can ensure your roof is strong, durable, and long-lasting. If you're unsure about any part of the construction process, always consult with a professional roofer for guidance.


The roof is one of the most critical elements in any home’s construction, providing protection and structural integrity. Building the frame and structure of a roof requires careful planning, the right materials, and precise techniques. Whether you're a professional builder or a DIY enthusiast, this guide will walk you through the fundamental steps of constructing a strong, durable roof frame and structure. We’ll also cover essential terms, materials, and safety tips to help ensure a successful roofing project.
1. Understanding Roof Structure Components
Before starting, it’s crucial to familiarize yourself with the key components that make up a roof’s structure:
Rafters: The sloped beams that form the roof’s main structure.
Trusses: Pre-fabricated wooden frameworks that provide support and shape for the roof.
Ridge Board: The horizontal beam at the peak of the roof where rafters meet.
Collar Ties: Horizontal beams that connect rafters near the ridge to prevent sagging.
Joists: Horizontal beams that run between walls and support the ceiling and roof.
Each part works together to create a stable, weatherproof structure that supports the roof covering and ensures safety.
2. Roof Design and Planning
Planning your roof’s design is essential before you begin any construction. Some of the most common roof styles include:
Gable Roof: A triangular-shaped roof that is simple to build and offers great ventilation.
Hip Roof: A roof where all sides slope downward, providing extra stability in windy areas.
Shed Roof: A single-sloping roof often used for home extensions or modern architecture.
Once you’ve chosen your design, use a blueprint to map out dimensions and angles. Make sure to account for local building codes, snow loads, and wind resistance in your area to ensure compliance with regulations.
3. Gathering the Right Materials and Tools
To build a roof frame and structure, you'll need a variety of materials and tools. Some of the key materials include:
Lumber: Choose high-quality lumber like treated pine or fir for rafters, joists, and trusses.
Fasteners: Nails, screws, and brackets are essential for securing beams.
Roof Sheathing: Typically plywood or oriented strand board (OSB), provides a surface for roofing material.
Roof Underlayment: A protective layer, such as roofing felt, is placed between the roof sheathing and outer roofing materials.
For tools, ensure you have the following:
Measuring tape, framing square, and level.
Circular saw or hand saw.
Hammer or nail gun.
4. Constructing the Roof Frame
Step 1: Installing the Ridge Board
Start by securing the ridge board at the top of the roof. The ridge board is the central beam where the tops of the rafters will meet. It needs to be level and well-supported at both ends by the walls of the house or structure.
Step 2: Attaching Rafters
Next, attach the rafters to the ridge board and walls. The rafters create the sloped sides of the roof and must be cut at precise angles to fit securely. Start at one end and work your way down, spacing the rafters evenly (typically 16 to 24 inches apart).
Step 3: Adding Collar Ties
Once the rafters are in place, you’ll need to add collar ties for additional strength. These horizontal beams connect rafters near the roof peak to help resist the outward force of wind or snow.
Step 4: Installing Roof Trusses (Optional)
For larger roofs or prefabricated designs, roof trusses may be used instead of individual rafters. Trusses are triangular-shaped frameworks that offer added strength and stability. Place trusses every 2 feet and secure them to the top plate of the walls.
5. Laying the Roof Sheathing
Once the roof frame is complete, it's time to install the roof sheathing. This layer forms the foundation for your roofing material, providing structural support and a barrier against the elements. Follow these steps:
Start from the bottom and work your way up, ensuring the panels are staggered for extra strength.
Nail the plywood or OSB sheathing to the rafters or trusses, making sure it’s flush and secure.
Leave small gaps between the sheathing panels to allow for expansion.
6. Applying the Underlayment
With the sheathing in place, the next step is to install a roof underlayment. This protective barrier, usually made of felt or synthetic materials, goes between the sheathing and the final roofing material (like shingles or tiles) to provide water resistance.
Roll out the underlayment from the bottom edge of the roof upward, overlapping each layer as you go.
Secure the underlayment with roofing nails or staples.
7. Adding Roof Flashing
Roof flashing is critical to prevent leaks, particularly around vulnerable areas such as chimneys, vents, and skylights. Install metal flashing where the roof meets these structures to channel water away and protect against leaks.
8. Safety Tips for Roof Construction
Building a roof can be dangerous due to the heights involved and the use of heavy materials. Always follow these safety tips:
Use fall protection: Wear a safety harness and use roof anchors to prevent falls.
Secure the ladder: Ensure your ladder is stable and extends 3 feet beyond the edge of the roof.
Work in pairs: Always have someone nearby in case of emergencies.
Wear protective gear: Helmets, gloves, and non-slip shoes are essential for safety on the job site.
Conclusion
Building the frame and structure of a roof is a complex but rewarding task that requires precision and attention to detail. By understanding the components of a roof structure, planning your design carefully, and using high-quality materials, you can ensure your roof is strong, durable, and long-lasting. If you're unsure about any part of the construction process, always consult with a professional roofer for guidance.


Blog